

Best Lighting for Nature Photography Prints
Table of Contents
- Why Lighting Matters for Displaying Nature Photography Prints
- Understanding Light Quality: Natural vs. Artificial Sources
- How to Light Framed Artwork Without Glare
- Picture Lights for Photography Prints
- Color Temperature for Viewing Art
- How to Prevent Art Prints from Fading
- Lighting Setup by Room and Print Size
- Frequently Asked Questions
Last Updated: October 15, 2026
Why Lighting Matters for Displaying Nature Photography Prints
The way you light a nature photography print determines whether it becomes a focal point or fades into the background. Proper lighting for nature photography prints transforms how viewers experience the image, revealing details, colors, and emotions that poor lighting obscures.
At Magick Brush, we understand that lighting is foundational to displaying fine-art nature photography. A piece like Cathedral of Palms, with its intricate botanical details and layered textures, demands thoughtful illumination to show the delicate interplay of light and shadow that Erin D'Elia captured. The right lighting setup turns a print into a portal, something that invites viewers to pause and breathe.


Without proper lighting, even museum-quality archival prints lose their power. Harsh overhead lights create glare that obscures the image. Dim ambient light flattens the composition. Uncontrolled natural sunlight fades colors over time. The goal is to find the balance: enough light to reveal the image's depth, positioned to minimize reflection, and consistent enough to protect the print's longevity.
Understanding Light Quality: Natural vs. Artificial Sources
Natural Light and Direct Sunlight
Natural light carries complexity. Morning and evening light, often called the golden hour, produces warm tones and soft shadows that complement many nature photographs. This same light quality, diffused and directional, is what photographers chase when capturing the original image. However, direct sunlight poses a serious problem for displayed prints: it fades colors over time and creates harsh glare on reflective surfaces.
If your print hangs near a window, consider the direction and intensity of light throughout the day. South-facing windows deliver the strongest, most consistent light but also the highest risk of fading. East-facing windows offer gentler morning light. West-facing windows bring intense afternoon heat. North-facing light is the most stable and least damaging, providing even illumination without the ultraviolet intensity that degrades pigments.
The practical solution: use natural light strategically, but never as your primary light source for valuable prints. Position prints away from direct sunlight, and supplement with controlled artificial lighting instead.
Artificial Lighting Options for Gallery Display
Artificial light sources give you control. LED panels, picture lights, and track lighting each serve different purposes. LED panels offer adjustable brightness and color temperature, making them ideal for larger installations or spaces where you want to modify the lighting mood. Picture lights, small fixtures mounted above or integrated into frames, provide focused illumination that draws the eye directly to the artwork.
Track lighting works well in larger rooms where you want flexibility to adjust coverage. The key advantage of artificial light is consistency: it doesn't change with weather or time of day, and quality LED sources produce minimal heat and ultraviolet radiation, protecting prints from fading.
Choose fixtures rated for art display. Standard household lighting often produces too much heat or the wrong color temperature, both of which can damage prints over time. Museum-quality lighting is designed specifically to illuminate art without causing harm.
How to Light Framed Artwork Without Glare
Positioning and Angle Techniques
Glare is the enemy of viewing art. It happens when light reflects directly off the surface of the frame or glass, obscuring the image beneath. The solution lies in angle and distance.
Position light sources at a 30 to 45-degree angle to the print's surface. This angle allows light to illuminate the artwork while the reflection travels away from the viewer's line of sight.
Distance matters too. Light sources positioned too close create hot spots, areas of intense brightness that overwhelm the image.
Test your setup before committing. Turn off other lights in the room and observe the print from different angles. You should see the image clearly without visible reflections on the glass or frame.
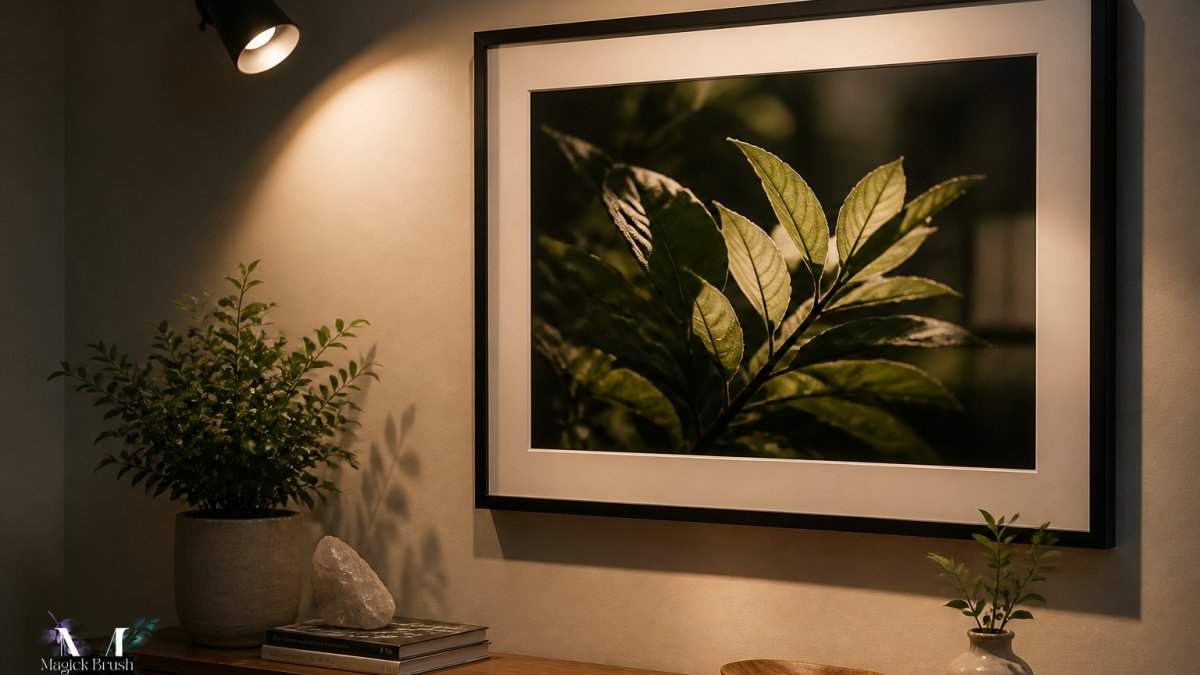
Matte vs. Reflective Surfaces
The finish of your print dramatically affects glare. Matte finishes scatter light diffusely, reducing reflection and glare. They're the safer choice for most displays because they're forgiving, even imperfect lighting angles produce acceptable results. Matte finishes also feel more intimate, inviting viewers to lean in and study details.
Reflective finishes, including glossy and semi-gloss, enhance color saturation and create a sense of depth. They're beautiful when lit correctly, but they demand precision. A single poorly positioned light source creates a distracting mirror effect. If you choose a reflective finish, invest extra attention in lighting placement.
Magick Brush offers both options. Fine-art prints come on museum-quality archival matte paper, which naturally resists glare. Aluminum Dibond prints provide a sleek, modern look. Consider your room's lighting situation when choosing: matte finishes work in rooms with multiple light sources or less-than-perfect lighting control. Reflective finishes reward careful setup.
Picture Lights for Photography Prints
Picture lights are purpose-built fixtures that mount directly above framed artwork. They're among the most elegant solutions for displaying nature photography prints because they deliver focused light exactly where you need it while remaining visually subtle.
A quality picture light includes an adjustable arm and dimmer control. The arm lets you angle light to minimize glare. The dimmer lets you adjust brightness to match the print's needs and your room's ambiance.
Installation is straightforward: mount the fixture to the wall or frame, position it at a 30 to 45-degree angle, and plug it in. Many picture lights include a cord that can be routed behind the frame or along the wall, keeping the setup clean and intentional.
For larger prints or gallery walls with multiple pieces, consider a combination approach: picture lights for individual framed prints paired with subtle ambient lighting to balance the room's overall brightness.
Color Temperature for Viewing Art
Color temperature, measured in Kelvin (K), determines whether light feels warm or cool. This matters because it changes how viewers perceive the print's colors.
Warm light (2700K to 3000K) mimics incandescent bulbs and candlelight. It feels intimate and brings out warm tones in images. Cool light (4000K to 5000K) resembles daylight and emphasizes blues and greens. Very cool light (above 5000K) feels clinical and can distort colors.
For nature photography, 3000K to 4000K is the sweet spot. This range feels natural without being cold, and it displays botanical subjects and landscape photography accurately. If your print emphasizes warm earth tones and golden light, lean toward 3000K.
Many modern LED fixtures let you adjust color temperature, giving you flexibility to match the print's mood and your room's aesthetic. Test different temperatures before settling on one, what looks right at 3000K in the evening might feel too warm in daylight.
How to Prevent Art Prints from Fading
Fading happens when light energy degrades pigments in the print. This process accelerates with ultraviolet radiation, high temperatures, and constant exposure. Preventing fading requires a multi-layered approach.
First, minimize ultraviolet exposure. UV-filtering glass or acrylic in frames blocks most harmful rays. Quality LED lighting produces virtually no UV radiation, making it infinitely safer than natural sunlight or incandescent bulbs.
Second, control brightness and duration. Prints displayed in well-lit rooms all day fade faster than those in dimmer spaces or rooms where lighting is used selectively.
Third, maintain stable conditions. Fluctuating temperature and humidity stress the paper and inks. Keep your display space at a consistent temperature (around 70°F) and moderate humidity (40 to 50%).
Finally, choose archival-quality prints. Magick Brush uses museum-quality archival paper and professional printing processes that produce prints designed to last decades with proper care. Cheaper prints with unstable inks fade much faster, regardless of lighting conditions.
Lighting Setup by Room and Print Size
Small Prints in Compact Spaces
Small prints, typically 8x10 to 11x14 inches, work beautifully in intimate spaces like bedrooms, offices, or entryways. In a compact room, you don't need powerful lighting. A single picture light or small LED panel positioned 2 to 3 feet away provides adequate illumination.
For a small print in a bedroom, consider a dimmer-equipped picture light set to a gentle level that complements the room's calming mood. This approach, used with prints like Night Tide, creates a focal point without overwhelming the space.
In a small office, position lighting to illuminate the print without casting shadows on your workspace. A wall-mounted LED panel to the side of the print works well. Adjust brightness to match your desk lighting so the room feels cohesive.
Large Landscape Prints in Living Areas
Large prints, 20x30 inches or bigger, deserve more thoughtful lighting because they command more visual attention. In a living room, a single light source often creates uneven illumination across the print's surface. Instead, use two complementary light sources positioned symmetrically on either side of the print, or a combination of picture lighting and ambient room lighting.
The Green Passage, a landscape photograph designed to anchor a space, benefits from layered lighting. A picture light draws attention to the print itself, while soft ambient lighting in the room prevents the print from appearing isolated.
For very large prints, consider track lighting that you can adjust as your room evolves. This flexibility lets you refine the lighting without reinstalling fixtures.
Botanical and Detail Prints in Meditation Spaces
Botanical prints invite close viewing. Pieces like Shadow Petals, with their intricate textures and subtle contrasts, need lighting that reveals fine details without harshness.
In a meditation space, lighting should feel calm and intentional. A single picture light positioned above the print works well, set to a warm color temperature (3000K) and moderate brightness. The goal is to invite viewers to lean in and study the details, to slow down and breathe.
If your meditation space has limited wall space, consider a smaller print (11x14 to 16x20) positioned at eye level on a dedicated wall. This arrangement creates a natural focal point for reflection without requiring elaborate lighting infrastructure.
| Setup Type | Light Source | Color Temperature | Best For |
|---|---|---|---|
| Small print, bedroom | Picture light, dimmable | 2700K to 3000K | Intimate spaces, evening viewing |
| Small print, office | Wall-mounted LED panel | 3500K to 4000K | Daytime work environments |
| Large landscape print | Dual picture lights or track lighting | 3500K | Living areas, gallery walls |
| Botanical detail print | Single picture light | 3000K | Meditation rooms, close viewing |
| Gallery wall (multiple prints) | Combination of picture lights and ambient lighting | 3500K | Flexible, multi-print displays |
The gift of art for the holidays or a celebration is the new cool thing. When you invest in a nature photography print from Magick Brush, thoughtful lighting transforms it from a beautiful object on your wall into a daily anchor for presence and calm. The Work of Light, a sunflower photograph celebrating the wisdom of turning toward what nourishes you, becomes exponentially more powerful when illuminated with intention.
Start with the fundamentals: position light at a 30 to 45-degree angle, choose warm color temperature (3000K to 4000K), and minimize direct sunlight exposure. From there, adjust based on your specific print, room, and viewing habits.
Frequently Asked Questions
What is the best lighting for displaying nature photography prints?
Soft, diffused light at a 45-degree angle works best for nature photography prints. Avoid direct sunlight and harsh overhead lighting, which create glare and can fade colors over time. LED accent lights with a color temperature around 3000-4000K provide warm, gallery-quality illumination that reveals the depth and detail in landscape and botanical photography without washing out the image.
How can you light a photo print without glare?
Position your light source at a 45-degree angle to the print surface, angling it away from eye level to redirect reflections. Use matte or archival-quality paper finishes rather than glossy surfaces, as they scatter light more evenly. Picture lights mounted above framed prints are designed specifically for this purpose, directing illumination downward while minimizing reflection on glass or acrylic covers.
What color temperature is best for viewing art prints?
A color temperature between 3000-4000K is ideal for viewing nature photography prints. This warm-to-neutral range mimics quality gallery lighting and allows viewers to see the photograph as the artist intended. Cooler temperatures (5500K and above) can make nature scenes feel harsh or clinical, while warmer light (below 3000K) may cast an amber tone that obscures detail in shadow areas.
Should you display photography prints in direct sunlight?
No. Direct sunlight accelerates fading in archival inks and can damage fine-art prints over months or years. Instead, position prints in areas with indirect or diffused natural light, or rely on controlled artificial lighting. If your print receives any direct sun exposure, consider using UV-protective glass or acrylic, and rotate the artwork periodically to minimize uneven fading.
Continue shopping at Magick Brush to explore our curated collection of fine-art photography designed for healing spaces, homes, and studios.